Projects
# Overview
There are two major projects for this course. The first is a mobile application built with React Native. The second is a mobile application build with Flutter.
All together the Projects are worth 40% of your final grade.
| Assignment | Weight | Due |
|---|---|---|
| React Native App | 20% | Week 7 |
| Flutter App | 20% | Week 15 |
# React Native Giftr App Project
The final project for React Native will be to create an app for collecting Gift Ideas for people.
# Summary and Layout
All the data for the people and the ideas will need to be held in global state as well as in AsyncStorage. The state and AsyncStorage data will be entirely managed through a Context object. All the functions for reading, updating, inserting, or deleting the people data need to be inside of the Context object.
There will be four screens:
- PeopleScreen - list the name and date of birth of each person from the global state.
- AddPersonScreen - add a new person object with a name, date of birth, and empty ideas array.
- IdeaScreen - list the name and image for each idea belonging to a selected person.
- AddIdeaScreen - add a new idea object inside the ideas array for a selected person.
# Data Structure
When saving your People and Ideas create objects like the following examples.
A new person would look like this:
[
  {
    id: 'd825796c-4fc1-4879-ad86-048ece61358b',
    name: 'Mr Man',
    dob: '1983-07-22', //optionally this could be a timestamp
    ideas: [],
  },
];
2
3
4
5
6
7
8
Be sure to include the empty array for ideas.
Then when you start adding ideas...
[
  {
    id: 'd825796c-4fc1-4879-ad86-048ece61358b',
    name: 'Mr Man',
    dob: '1983-07-22', //optionally this could be a timestamp
    ideas: [
      {
        id: '5853e2de-2bc1-436f-9754-90022d7b24d2',
        text: 'Something Cool',
        img: 'file:///data/user/0/host.exp.exponent/cache/ExperienceData/%2540anonymous%252Fgiftr1-d825796c-4fc1-4879-ad86-048ece61358b/Camera/1000eac5-deff-4003-a7e2-3fba0c98c314.jpg',
        width: 500,
        height: 500,
      },
      //more idea objects here...
    ],
  },
  //more people objects here...
];
2
3
4
5
6
7
8
9
10
11
12
13
14
15
16
17
18
# Required Features
PeopleScreen Features
The PeopleScreen is the first screen shown when the app loads.
- The data array loaded and shown needs to come from the global Context Provider.
- If the array is empty then a message should be displayed on the screen asking the user to add a first Person.
- When there is data available in the array, each Person should be displayed via a
<FlatList>. - Each item in the
FlatListshould show a full name plus the month and day from their date of birth. - The
FlatListshould be sorted by month first and then day. In other words, the People should be displayed in the order of their birthdays in the year. - Each item in the
FlatListalso needs to have an icon that the user can tap to navigate to theIdeaScreen. - When you navigate from the
PeopleScreento theIdeaScreenyou need to pass theidof the person throughRouteparams. - There needs to be a
FABor nav header link to navigate to theAddPersonScreen.
AddPersonScreen Features
The AddPersonScreen will use a TextInput and a DatePicker from
https://hosseinshabani.github.io/react-native-modern-datepicker/ (opens new window) to collect the name and date of birth of the person being added.
- You can save the selected date as string or timestamp. See the notes in module 7.1 about doing this.
- Make sure that both the name and dob are provided before you save the person.
- After a successful save, navigate back to the
PersonScreen. - If the save fails, show a
Modalabout the error instead of navigating back. - The
PersonScreenshould show the updated list and include the newly created person after successfully saving. - There should be a Save and a Cancel button. The Cancel button returns the user to the PersonScreen.
- Use
KeyboardAvoidingViewaround each control in your form.
IdeaScreen Features
The IdeaScreen will display a list of all gift ideas for the selected person.
- There should be a heading above the list that indicates which person is associated with the list of gifts.
- Route params are used to get the id of the person.
- There should be a method in the Context object for getting the list of ideas for a specific person based on the person id.
- The list of ideas should be displayed in a
FlatList. - If the list of ideas is empty then display a message about adding an idea.
- There needs to be a
FABor a header link to navigate to theAddIdeaScreen. Remember to pass the person id to theAddIdeaScreenthrough Route params. - Each item in the
FlatListshould have a thumbnail version of the image, the text for the idea, and a delete button. - Pressing the delete button should call an async function in the Context object to remove the idea from the person and then update the full list.
- Successfully deleting an idea should trigger a reload of the contents because the list of ideas is updated.
- The thumbnail images should be the same aspect ratio as the images that were saved, just smaller.
AddIdeaScreen Features
The AddIdeaScreen will use a TextInput and a Camera component to save a name for the gift idea plus take a picture of the idea.
- The images should be saved at an aspect ratio of 2:3. Save this value as a state variable or ref so you can use it later.
- When taking the image from the camera use a value between 50 and 70% of the screen width as the image width. Then calculate the height based on the screen width percentage times the aspect ratio. These calculated values should be saved in your context object (state and async storage).
- When taking the picture you will first need to get the Camera permissions using the hook
or the method. - When taking the picture use the
.getAvailablePictureSizesAsync()method to control the sizes used by the camera. See the notes in module 7.1 about this. - When returning from this screen to the
PersonScreenbe sure to navigate and send the person id back through Route params. - Make sure that both the text and the image values are provided before you save the idea.
- The validation and saving should be done in a function inside the Context object.
- There should be a Save and a Cancel button on the screen.
- The Cancel button will send the user back to the
PersonScreenwithout saving anything. However, you still need to pass the person id back through the Route params. - Use
KeyboardAvoidingViewaround each control in your form.
General Features
- There needs to be a single
Stack.Navigatorthat loads the four screens. - There needs to be a single
Contextobject that has aProviderinApp.jswrapped around the Navigation stack. - All the functionality for validating and saving data in the
Contextobject needs to be done inside functions that are inside of the Context Provider function and made available through the context hook. - All errors, confirmations, and warnings should be displayed through a
<Modal>component. A good approach would be to create a component file for the Modal. Pass the type and message and buttons and functions to the component to customize the modal. Just import the component on each screen that needs it. - Every person and every gift need a unique id. You can use the
expo-cryptomodule to generate the id with therandomUUIDmethod. - Your app should have a custom SplashScreen and Launcher icon. You can use the Figma template from the link in module 5.2 to create these.
# Optional Features
From this list of optional features you need to select TWO features to add.
- Add a
Swipeableto theFlatListon thePeopleScreenpage which will expose a delete button. When pressed, the button will call an async function in the Context object to delete a person. When successful the list should automatically update itself. - Tap image thumbnail to view in fullsized modal from the
FlatListon theIdeaScreenpage AND show the preview image on theAddIdeaScreenwhile taking the picture. - Implement a UI Kit on all screens. Use
React Native ElementsorReact Native PaperorGlueStack. - Change the navigation between the list and add screens based on the OS. If Android, use a FAB to go to the screen for adding a person or adding an idea. If on iOS, use the header link.
- After pictures are taken with the Camera, move them from the
cachefolder to thedocumentfolder for the app. This will make them a permanent image available the next time the app opens. See the notes in the Module 4.1 notes on how to use theFileSystem.moveAsyncmethod to move the image file. When deleting an idea be sure to use theFileSystem.deleteAsyncmethod to delete the image file too.
# Animation
Demo video for the Giftr Project App
# Submission
For a full list of the submission requirements, visit the BS LMS assignments section.
Your project needs to be a
gitrepo. Save your finished project as a private repo on Github.
Invite
griffis@algonquincollege.comto collaborate on the Github repo.
Submit the URL for your repo in BS LMS.
Due at the end of week 7. See BS LMS for the exact due date and time.
# Flutter App Project
# Movie Night!
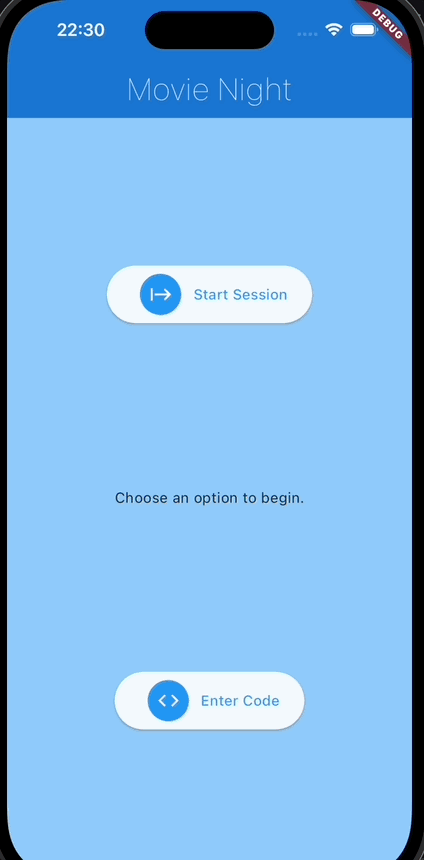
The Movie Night App is an app meant to be used by two people simultaneously to help people choose a movie to watch together.
The app has four screens.
- A welcome screen where they choose to be the person starting the session or the person entering the shared code.
- A screen that creates the code to share with the other user, and then being the movie matching.
- A screen that lets the second user enter the code, and then begin the movie matching.
- The movie selection screen talks to The Movie DB API (opens new window) to fetch the most recent or most popular or upcoming movies, 20 at a time.
The app talks to the MovieNight API found here (opens new window). The home route for the API provides a list of the other API endpoints, along with their required Request parameters and the properties in the Response object.
Here is the contents of the MovieNight API home route.
  "data": {
    "message": "Hello from the Movie Night API!",
    "GET /start-session": [
      "requires {String device_id}",
      "returns {data: {String message, String session_id, String code }}"
    ],
    "GET /join-session": [
      "requires {String device_id, int code}",
      "returns {data: {String message, String session_id }}"
    ],
    "GET /vote-movie": [
      "requires {String session_id, int movie_id, Boolean vote}",
      "returns {data: {String message, int movie_id, Boolean match}}"
    ]
  }
}
2
3
4
5
6
7
8
9
10
11
12
13
14
15
16
17
# Welcome Screen Requirements
- Use the device id package
platform_device_id: ^1.0.1to get the unique id for the user's device. If you cannot get this to load on Android, then you can use another similar package. - Save the device id in a place that can be retrieved from any screen.
- Show the two options - get a code to share, or enter a code that has been shared with you.
- The get a code to share option button will navigate to the share code screen.
- The enter code button will navigate to the enter code screen.
# Share Code Screen Requirements
- As loading this screen, make an HTTP call to the MovieNight API
/start-sessionendpoint. - Save the session id in a place that can be accessed from other screens.
- Have a button that will navigate to the Movie Selection Screen.
# Enter Code Screen Requirements
- Have a TextField or TextFormField that requires a number be entered. Maxlength of 4.
- Have a button that will submit the entered code to an HTTP call to the MovieNight API
/join-sessionendpoint. - Save the session id returned from the API in a place that can be access from other screens.
- After saving the session id, navigate to the Movie Selection Screen.
- If an error is returned from the API about the entered code then remain on the page and display the error message in an
AlertDialogorSnackBar.
# Movie Selection Screen Requirements
- Arriving on this screen means that the user should have both a device id and a session id available.
- As the screen loads, make an HTTP call to TMDB and fetch a list of movies.
- You can fetch upcoming movies, or popular movies, or in theatre movies as the data set.
- TMDB will return a page of results (20 movies). Each time you request more movies you will have to increment the
pagevalue in the querystring&page=2. - Your movies need to be saved in a
List<Map<String, dynamic>>. Remember that TMDB sends back an Object with aresultsproperty that holds the List. - On the screen use a
Dismissablewidget to wrap your movie details, so it can be swiped left or right. - Only add ONE movie from the List to the screen at a time. Use a state variable to hold the index position from the movie List that is being shown.
- For each movie, display the title, the poster_path image, and two other pieces of information from the dataset.
- When the user swipes left or right, display an image or icon indicating whether the person voted yes or no for the movie.
- When the user dismisses a movie card by swiping, make an HTTP call to the MovieNight API
/vote-movieendpoint. - The result from the
/vote-movieendpoint will contain amovie_idinteger and amatchboolean. If thematchvalue is true then the user has matched with their partner. - Display an
AlertDialog, or similar modal dialog, with the details of the matched movie and an OK button. - The OK button should take the user back to the Welcome screen.
- After each vote result, increment your current index state variable to load and display a new
Dismissablewith a new movie. - When you are displaying the last movie from your dataset, make another Http call to the TMDB API and ADD those new movies to your existing List. This way you will always have the old movie ids and details to display when getting a match.
# Http and Data Requirements
- You should have an HttpHelper class that contains all the methods that you use to talk to either the MovieNight API or the TMDB API.
- The Device id from the user's device and Session id from the API should each be saved in
SharedPreferences, aChangeNotifierProvider, or aJSONfile.
# Design Requirements
- Have a unique launcher Icon and Splashscreen (created by you) in your app.
- All text should have an accessible contrast level with its background.
- You should have a base number that you use for spacing. Eg: 8.0. Then ALL padding and margin in your app should be a multiple of that.
- Select a single Google Font to use in your app. Download the font variants you want and include them in your assets.
- Define a
ColorScheme()inside your MaterialApp theme property where you are defining all the colour values. Eg:primary,onPrimary,background,onBackground,brightness, etc. - Define a
TextTheme()inside your MaterialApp theme property where you define all the textTheme types that you are going to use in your app. Eg:displayLarge,bodyMedium, etc.
# General Requirements
- An AppBar should display the name of the app on every screen.
- All
constrequirements given by the linter should be met. - There should be NO errors in the Problems or Debug Console
- Any
print()commands that you have in your code should be wrapped with an if statement that checks forkDebugMode. - Movie poster images can sometimes be
null. So, you must have a default image in your assets.
Extra Bonus Challenge
Create a FileHelper class to deal with working with JSON files.
Create a JSON file that stores all the movies that a user votes yes for. Every time they vote yes, add the details about that movie to an Array in the JSON file.
Add a link in the AppBar for every page, that goes to the previous yes vote screen. This is an additional screen. Read the contents of the Array from the JSON file and put it into a Dart Set with NO duplicates.
Display the List in a ListView with ListTiles. Display tiny thumbnails for each movie in the leading property for each List Tile. Also display the title and release_date.
Bonus Bonus
Add the ability to remove an item from the ListView, which needs to also remove the Map it from the JSON file.
For a full list of the submission requirements, visit the BS LMS assignments section.
Your project needs to be a
gitrepo. Save your finished project as a private repo on Github.
Invite
griffis@algonquincollege.comto collaborate on the Github repo.
Submit the URL for your repo in BS LMS.
Due at the end of week 15. See BS LMS for the exact due date and time.