Class Assignments
# Overview
This course has four assignments that cover building apps with React Native and Flutter. Together they account for 40% of your final grade.
| Assignment | Weight | Due |
|---|---|---|
| React Native App 1 | 10% | Week 3 |
| React Native App 2 | 10% | Week 5 |
| Flutter App 1 | 10% | Week 11 |
| Flutter App 2 | 10% | Week 13 |
# 1 - Basic React Native App
React Native Basic Navigation
This first exercise is a demonstration of how Stack Navigation through React Navigation works in React Native.
In your App.js define the <NavigationContainer> and <Stack.Navigator> plus a <Stack.Screen> for each of the THREE screens in your app.
Create a pages or screens folder that will hold three component files for the pages. The three pages can be called whatever you like. The content of the pages can be anything you like but the
minimum components that they use must be:
- Home page - must include:
<SafeAreaView>,<Text>, and<Button>. - Second page - must include:
<SafeAreaView>,<ScrollView>, and<Image>. - Third page - must include:
<SafeAreaView>,<FlatList>,<Pressable>, and<Text>.
Each page needs to have a way to navigate to the other two pages.
Your project needs to be a
gitrepo. Save your finished project as a private repo on Github.
Invite
griffis@algonquincollege.comto collaborate on the Github repo.
Submit the URL for your repo in BS LMS.
Due at the end of week 3. See BS LMS for the exact due date and time.
# 2 - React Native App
React Native Data Fetching
This exercise is a demonstration of how to use external APIs to fetch, save data in state and display that data.
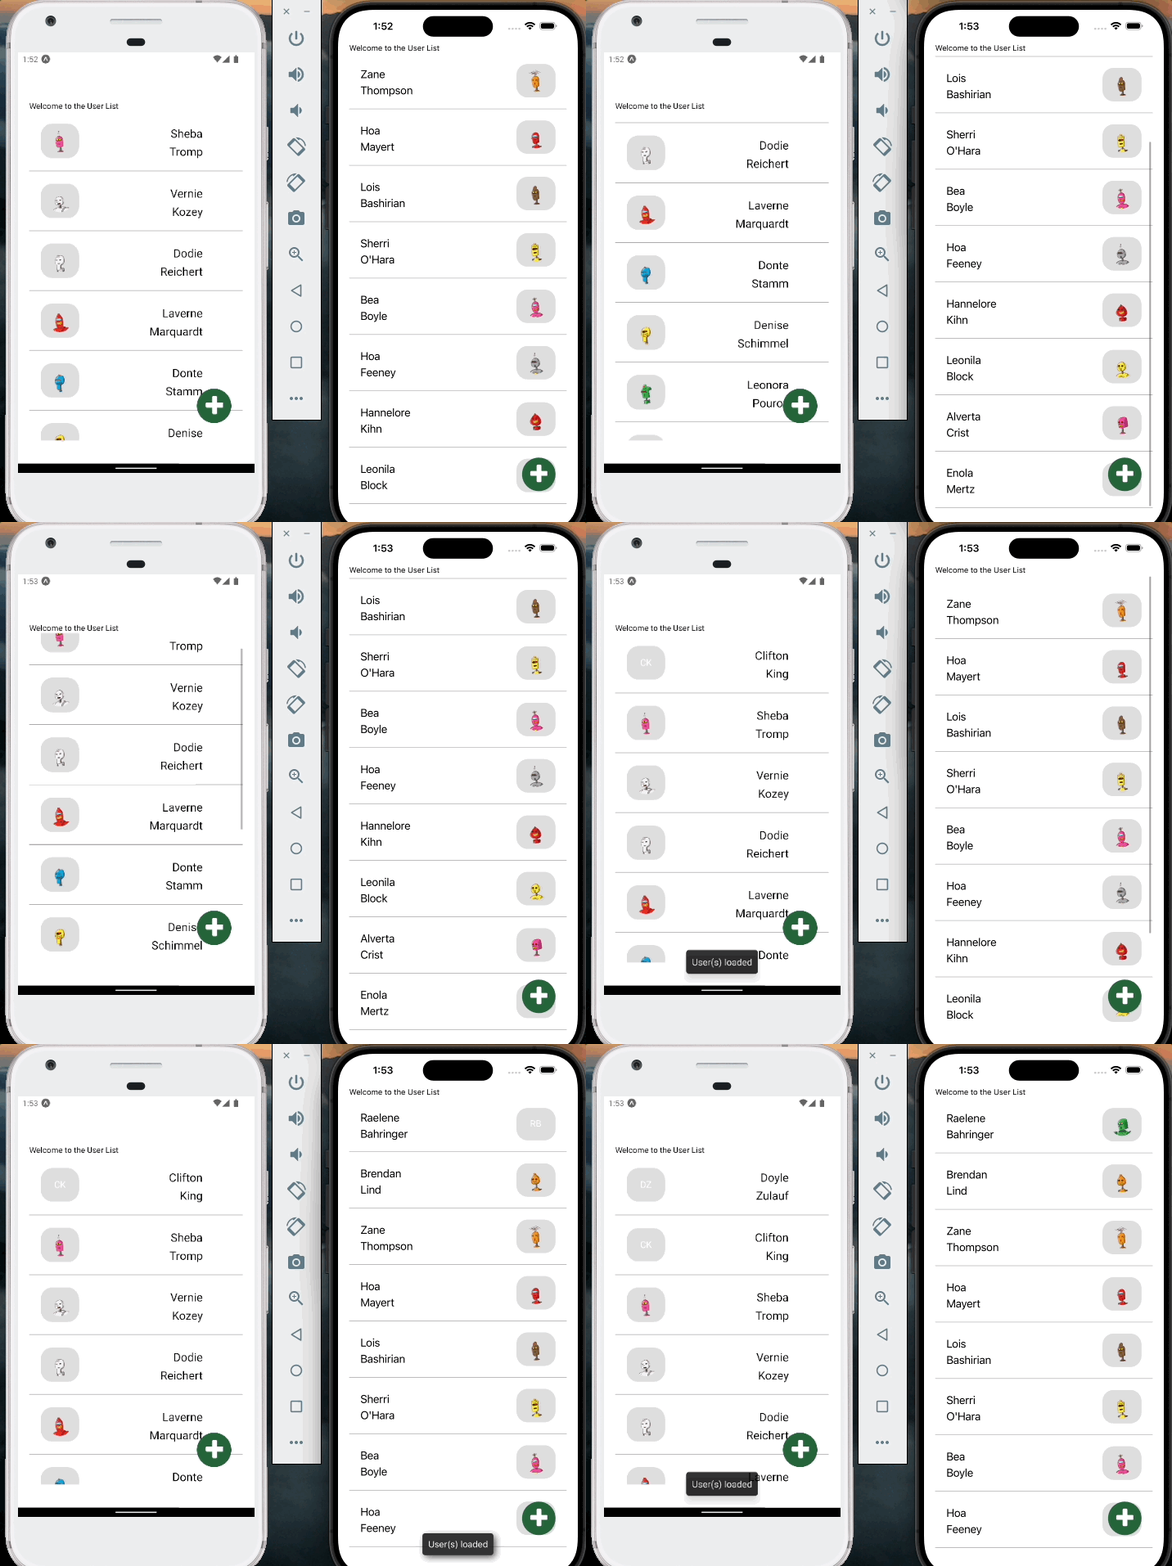
There is only one screen for this app. When the app loads, it will make a fetch call to get 10 users from the Random Data API (opens new window). For each user we create an item in a
React Native <FlatList>. The only data that we need for each item is an id/uuid, an avatar, a first name, and a last name.
The layout for each item in the FlatList changes depending on whether we are on iOS or Android. If on iOS, the avatar should be to the right-side of the item. If on Android, the avatar should be on
the left-side of the item. Use the Platform API to figure out which OS the app is running on.
Display the Avatar to the side of the item with https://github.com/avishayil/react-native-user-avatar (opens new window). npm install react-native-user-avatar.
Then display the first name stacked on top of the last name. Use the id/uuid as the key for the item.
The screen also needs to have a Floating Action Button (FAB) that displays a plus icon. When the user clicks the plus button, then you fetch ONE more user from the random data API. Add the single user to the TOP of the FlatList.
If the user pulls down on the app screen and releases, you should refresh the page and load 10 new random users to the FlatList.
Here is a demo image of the app running on iOS and Android, showing the change in layout.

Your project needs to be a
gitrepo. Save your finished project as a private repo on Github.
Invite
griffis@algonquincollege.comto collaborate on the Github repo.
Submit the URL for your repo in BS LMS.
Due at the end of week 5. See BS LMS for the exact due date and time.
# 3 - Basic Flutter App
This first Flutter App assignment is to build a basic one screen layout with local and remote assets and scrollable areas.
# Fonts
Visit the Google Fonts website (opens new window) and select a font that has multiple variants (weights and styles). Download the different font files and save them in a local fonts folder
in your project. You should have 3 or more font files downloaded for the one font family.
Add the variations of the font to your pubspec.yaml file so they can be used in your app.
# Images
Download 3 images of the same size (roughly 800x600) and save them to a local images folder.
Then add the images to the assets section of your pubspec.yaml file.
# Layout
Your app should start with a MaterialApp widget with title, theme and home properties. The home property should load a Scaffold widget with appBar and body properties. The body
should hold a Padding widget, which contains a ListView.
Set the font family that you downloaded into your fonts folder as the default fontFamily in your ThemeData widget for the MaterialApp widget.
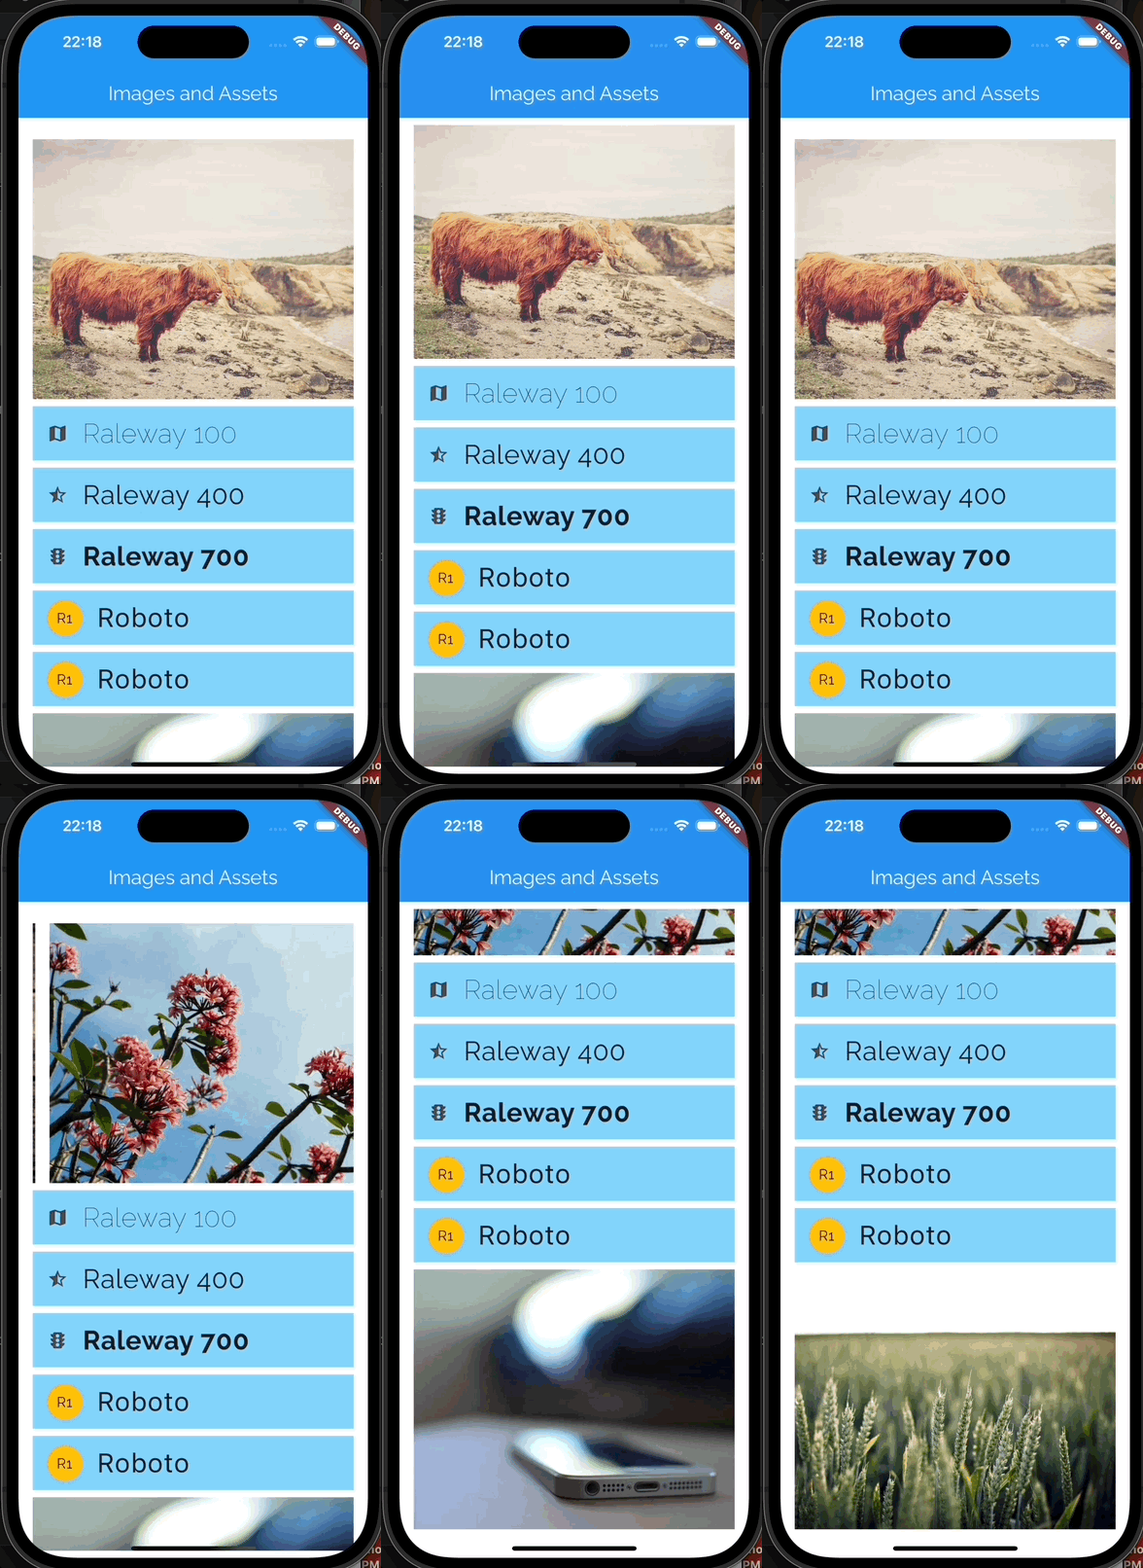
Your screen should have on ListView widget that scrolls vertically and contains all the content for the page. The ListView will contain two other ListView widgets that scroll horizontally.
Between the two horizontal ListView widgets you need to have a series of at least four ListTile widgets.
There should be a standard amount of space between each of the horizontal ListViews and ListTiles. You can see this layout and spacing in the demo video below.
One of the horizontal ListView widgets should contain three or more images that are loaded via an external URL. You can use either Image(image:NetworkImage()) or Image.network. The images should
have a standard amount of spacing between them too.
The other horizontal ListView widget should contain three or more images that are loaded from the assets folder. You can use either Image(image:AssetImage()) or Image.asset. The images should
have a standard amount of spaceing between them too.
The ListTile widgets should each have a different fontFamily variation. Use one font variant for each of the ones that you have in your fonts folder, and then at least one ListTile with a font
that will be on the device by default.
Each ListTile needs to have at least a title property widget plus a leading or tailing widget. For the leading or tailing widget you can use either an Icon or a CircleAvatar widget.
# Demo

Your project needs to be a
gitrepo. Save your finished project as a private repo on Github.
Invite
griffis@algonquincollege.comto collaborate on the Github repo.
Submit the URL for your repo in BS LMS.
Due at the end of week 11. See BS LMS for the exact due date and time.
# 4 - Flutter Navigation App
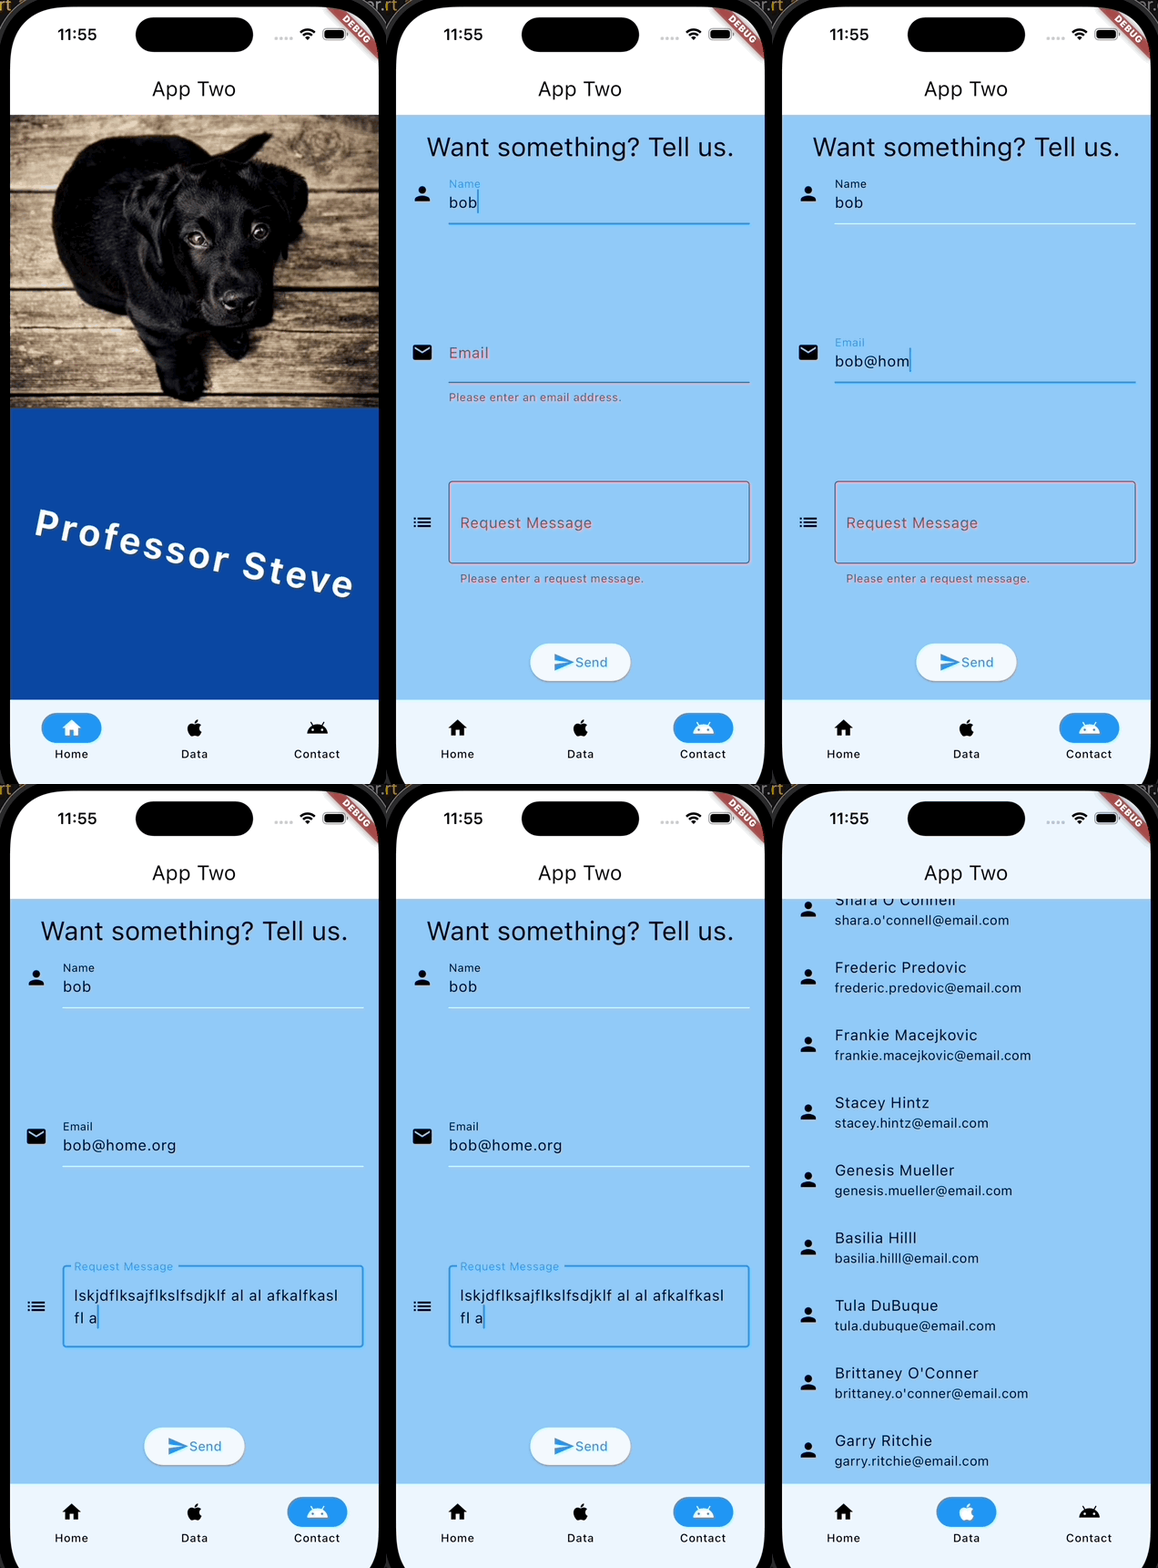
For this assignment you will be building a Flutter app that uses a NavigationBar() widget to navigate between three different screens: Home, Data, and Contact.
# Home Page
The home page should be made with a StatelessWidget with a Column that fills the screen and is divided equally between two parts. The top half uses an AssetImage as a background image. The
bottom half should have a dark background color with light coloured text in a Text() widget. The color and font settings for the Text() widget should come from the Theme, not a custom
TextStyle() widget.
The Text() widget in the lower half should also have a transformation applied to it.
# Data Page
The data page should be made with a StatefulWidget which makes an http call to any API that you want, except JSONPlaceHolder. The call should be to an API that returns JSON. The returned data should
be a List that contains 10 - 20 Map objects.
Once the data has been retrieved and converted from the JSON string into a List, use a FutureBuilder to create either a ListView or a GridView to display at least two of the values from each
Map inside the List.
# Contact Page
The contact page needs to be a StatefulWidget with a Form() with a Column() that contains a Text() widget title, three TextFormField() widgets and an ElevatedButton() widget. Remember that
the Form must have a GlobalKey.
The first TextFormField should have autofocus set to true.
Every TextFormField should have an onSave function plus a validation function.
One of the TextFormField widgets should be a multiline one.
Each TextFormField needs appropriate values set for the keyboardType and textInputAction properties. They also should have a decoration property with icon, hintText, and labelText.
# General Requirements
Create a ColorScheme inside the MaterialApp( theme: ThemeData() ) using either the default ColorScheme constructor, or the Theme.of(context).colorScheme.copyWith() method.
Create a TextTheme inside the MaterialApp( theme: ThemeData() ) using either the default TextTheme constructor, or the Theme.of(context).textTheme.copyWith() method.
There should be a data model class that defines the properties for each element in your data array for the data page.

Demo video coming soon
Your project needs to be a
gitrepo. Save your finished project as a private repo on Github.
Invite
griffis@algonquincollege.comto collaborate on the Github repo.
Submit the URL for your repo in BS LMS.
Due at the end of week 13. See BS LMS for the exact due date and time.
