Debugging and Local Builds
# Linked In
- We have a private LinkedIn Group for graduates of the program
- Everyone who makes it to the MAD9145 Applied Project course will be invited to join this group.
- This is where we post contracts and jobs for graduates.
- It is also a place where you can post jobs or look for partners for ventures of your own.
- You can use it to connect with your classmates or with former Alumni of the program.
- If you do NOT have a Linked In profile yet, please create one today.
- Send a connection request to Steve on Linked In.
- After he accepts all the invitations he will invite you to the group.
# Debugging React Native Apps
React Native switched from the JavaScriptCore JS Engine to the Hermes Engine in 2022. This has led to much better performance with React Native Apps.
In 2023 Expo switched to using this new JS Engine too.
While this means better performance and smaller app sizes, it has meant that there have been fewer Development and Debugging tools in the short term.
Currently, if you have a React Native app running through the Expo Go app you can open the developer menu and select the JS Debugger. This will open a standalone copy of the Chrome Dev Tools and
let you use those tools to see JS errors, console.log statements, and monitor the Network requests.
A better choice for debugging is to install the Expo Tools and React Native Tools extensions in VS Code. Once those are installed you can start using any of the commands from the Command Palette
in VS Code.
Open the Command Palette with Command + Shift + P. Then type "React Native" to see the list of possible commands.

Run the check development environment config command as shown in the image above. This will test your computer for Android and iOS configuration requirements.
To launch the new React Dev Tools for your app we need to set up one more thing.
Open the Run and Debug panel by clicking the button above the extensions button that looks like a play button with a bug on it.
First, close any project files that are currently open. Then in the Run and Debug panel click on the link to create a launch.json file. (It will create a .vscode folder with a launch.json file
inside that folder). In the first menu that appears you should see a list of choices that includes React Native. Select the React Native option.
In the second menu we need to select ONLY the two options:
- Debug Android Hermes
- Debug iOS Hermes
Now you should have a launch.json file with the settings and support for these debuggers.
Now you can start your React Native app from the Terminal with npm run start. Then launch your iOS or Android app with the i or a keys.
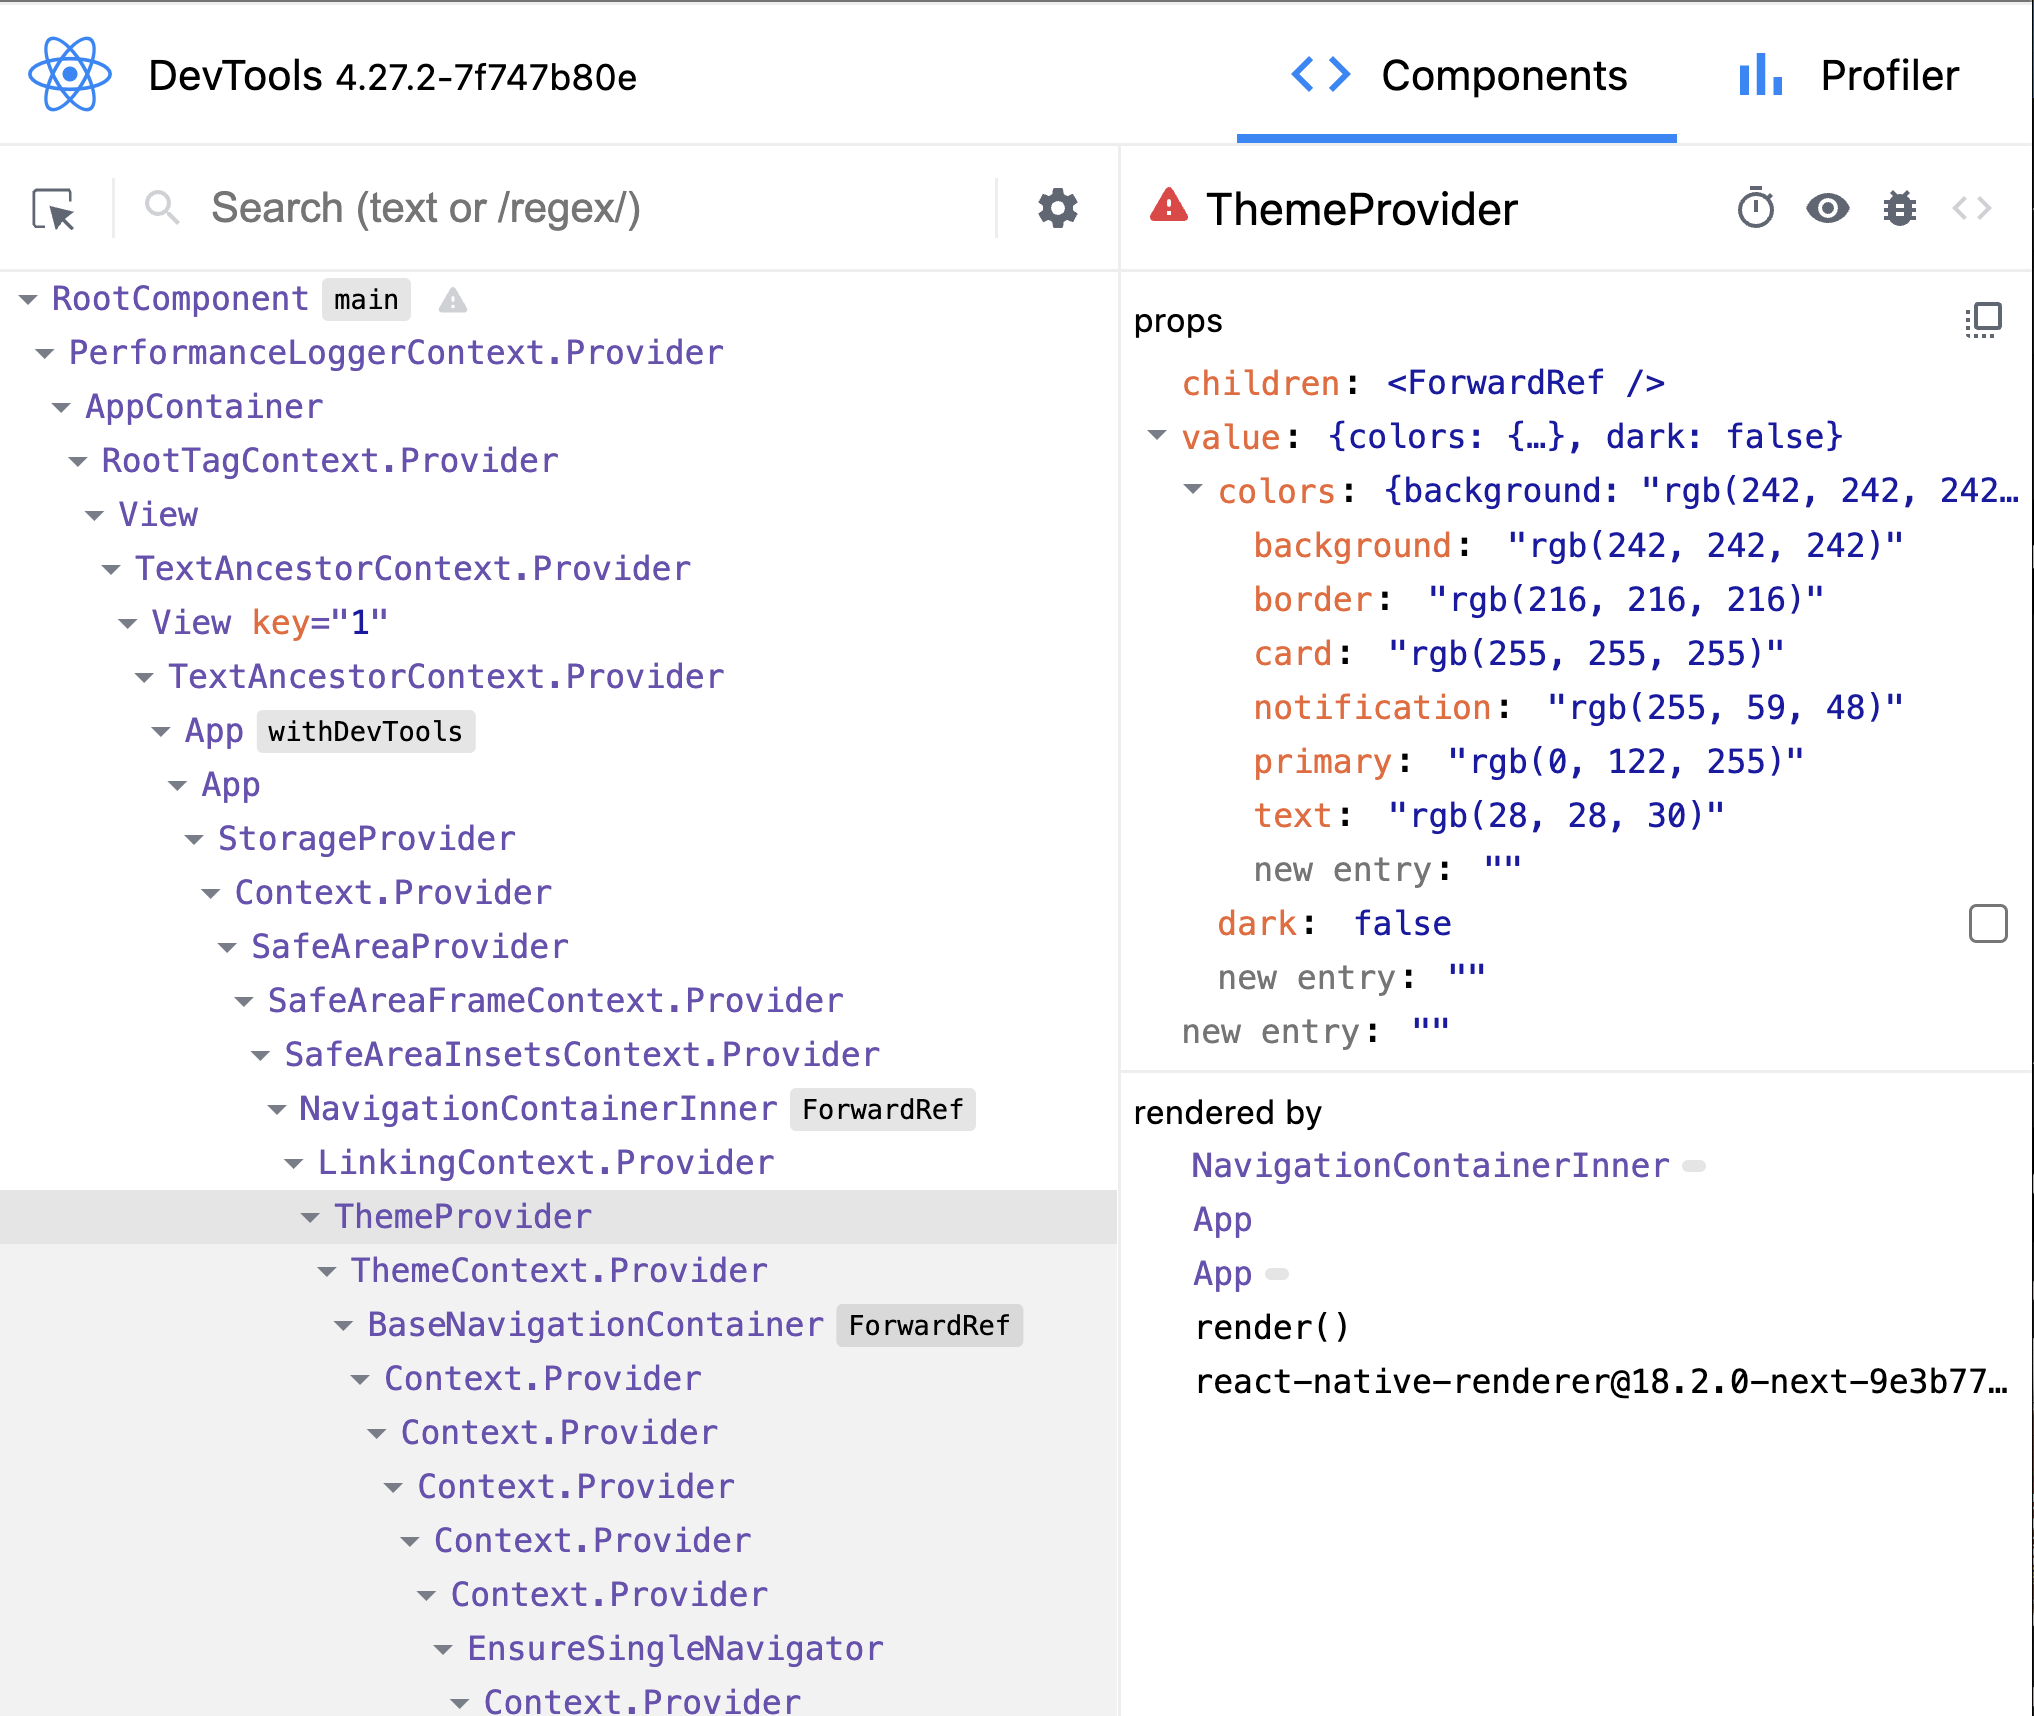
Once your app is running you can use Shift + m to see the additonal tools list. Select React Dev Tools from the list and it will open a Chrome Dev Tools window with a searchable display of all
components and their properties.
# More about React Native Builds
Once you have run the Command Palette React Native: Check development environment configuration command. It will look at all the required tech for android and ios apps. When complete, you should see
a list with checkmarks beside each item like the image below.
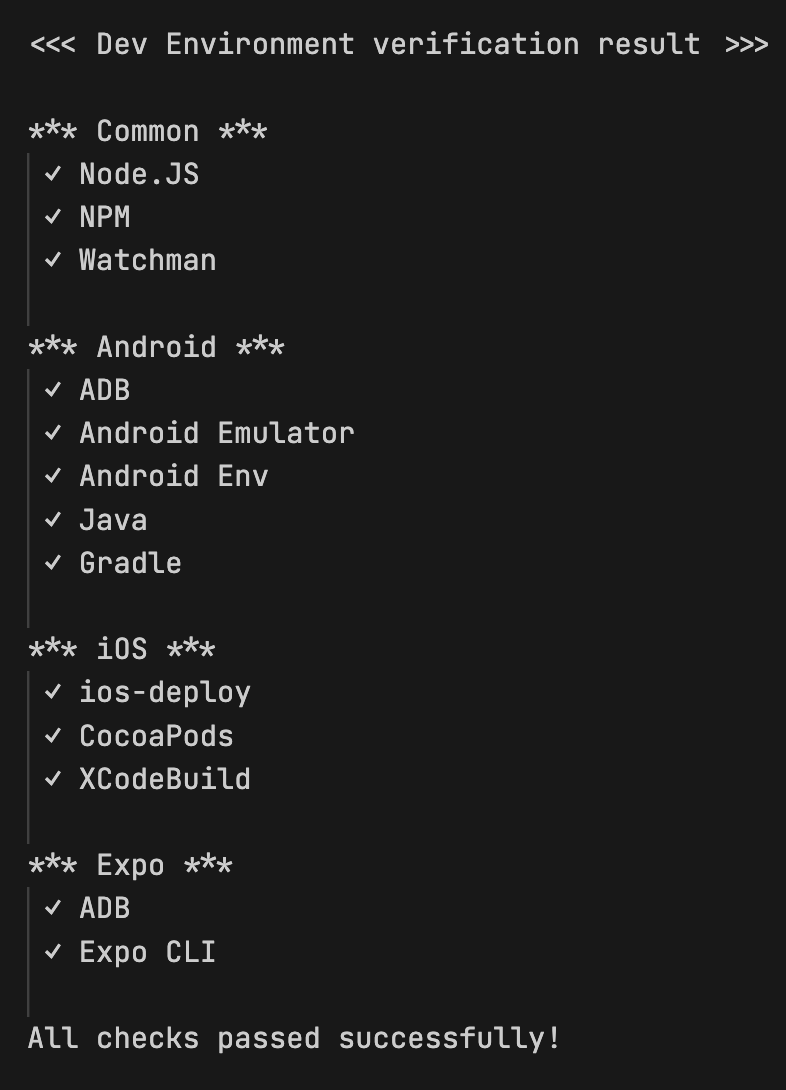
If you are missing watchman or ios-deploy or gradle you can use HomeBrew to install them.
brew install watchman
brew install ios-deploy
brew install gradle
2
3
If Android ENV is missing, it means that you need to create a new Environment variable called ANDROID_SDK_ROOT set to the location of your android sdk. This should be done inside your .zshrc file
from your user home folder. /Users/<yourusername>/.zshrc.
As an example, this is what the first two lines of my .zshrc file looks like.
#
export ANDROID_SDK_ROOT=/Users/steve/Library/Android/sdk
2
If you have xs beside the ADB and Emulator items, then you need to update your PATH variable.
You can have as many lines as you want in your .zshrc file that start with export PATH=. Each one will be adding a new string path for some application to the full PATH string.
Usually all the path values are put together in a single line. You can split them into multiple lines if you want as long as each line starts with export PATH=. Every line should also include
$PATH (the current value of the PATH variable) at the start or end.
Between each of the parts of the path you need to have a :.
The three new parts that we need to add are all folders inside the Android sdk folder.
emulatorplatform-toolstools/bin
So, you can write it either if these two ways.
export PATH=/Users/steve/.npm-packages/bin:$PATH:$ANDROID_SDK_ROOT/emulator:$ANDROID_SDK_ROOT/platform-tools:$ANDROID_SDK_ROOT/tools/bin
or
export PATH=/Users/steve/.npm-packages/bin:$PATH
export PATH=$ANDROID_SDK_ROOT/emulator:$PATH
export PATH=$ANDROID_SDK_ROOT/platform-tools:$PATH
export PATH=$ANDROID_SDK_ROOT/tools/bin:$PATH
2
3
4
Once you have all these installed (you will have to restart VS Code) re-run the Command Palette React Native: check command to confirm that you have everything ready.
Now, we can actually create the android and ios native apps to install outside of Expo Go. Run this command to create the android and ios folders and do the initial builds for your app.
npx expo prebuild --clean
This will create both the android and ios apps. The first time you run this, it will take a few minutes for the gradle and cocoapods parts to run.
Then to launch the apps we run both these commands separately.
npx expo run:android
npx expo run:ios
2