9.1 Setting Up for Flutter
# Flutter
Flutter is an open source framework by Google for building, natively compiled, multi-platform applications from a single codebase written with Dart.
Flutter apps can be developed in either VS Code or Android Studio.
They can be developed on either Windows or MacOS. However, iOS apps can only be compiled and tested on MacOS.
WARNING
Mac OSX REQUIRED for iOS. So, we will be running everything for the second half of the course through MacOS.
Here is the reference for installing Flutter on MacOSX
We need to first download and install the Flutter SDK. Here is the download site for the fltter SDK. The Flutter SDK will include everything you need to run applications built with the Dart language. At the time of writing the the most stable version is the version 3.22.2 of Flutter.
Download for Intel processor: https://storage.googleapis.com/flutter_infra_release/releases/stable/macos/flutter_macos_3.22.2-stable.zip
Download for Apple processor: https://storage.googleapis.com/flutter_infra_release/releases/stable/macos/flutter_macos_arm64_3.22.2-stable.zip
When you are finished downloading the SDK, you will want to extract it to a known location. You will need to update your Environment variable PATH to point to the bin folder inside this location.
I would recommend creating a folder called flutter inside your user folder. That would make the location that we need to add to the PATH - ~/flutter/bin/. You will update the PATH inside your
~/.zshrc file.
After you have moved the extracted Flutter SDK to that location, updated your PATH, and restarted your Terminal, then you need to run the command line tool flutter doctor in a Terminal.
flutter doctor
The flutter doctor will check for any missing dependencies on your Mac. You can run this command as many times as you want.
If you want to check and see where you have Flutter and Dart installed, run this command:
which flutter dart
# Flutter in VS Code
Reference for setting up VSCode for Flutter
Build Flutter apps in VS Code is a simple matter of installing and updating the Flutter extension by Dart Code, through the Extensions panel in VS Code. At the time of writing, this extension was
on version 3.74.0.
When you want to start a new Flutter project in VS Code open a new empty project folder, type ⌘ CMD + ⇧ SHIFT + P to open the command pallette and type "flutter". You will see a list of three
possible commands - New Project, Run Doctor, and Upgrade. Select the New Project item with your arrow keys and hit enter.
Next you will be given options about what to create. Select Flutter Application. You will then be prompted for a name and location for the project. Select your empty project folder and wait for
everything to be set up for you. When it is ready you will see the main.dart file open in VS Code, ready for you to edit and run.
You will also see a bunch of notes appear in the Output panel in the Terminal area. The most important part being the flutter run command that you will need to start your app.
# Start a Flutter Project in VS Code
In VS Code, open a new empty folder called my_app. Next, open the Terminal window in VS Code. It should already be pointing to the current empty folder. Then we will run the flutter tool from the
command line to create our new project.
This command could be used to create our new project.
flutter create my_app
Flutter project names must be lowercase and and NO spaces. This would create a folder called my_app and build your starter project inside that folder. So, this means that we would have a folder
called my_app inside of a folder called my_app. Really redundant.
Instead, just add a period instead of the project name. This will create the project inside the current folder and name it after the current folder name.
flutter create .
# Flutter in Android Studio
Reference for setting up Android Studio for Flutter
With Android Studio installed (on MacOS) you should be running an updated version. Start Android Studio and, on the Welcome screen, look for the cog icon. Click the cog and check for updates. This will require a restart of Android Studio to install any update.
We are using the Flamingo or Giraffe version of Android Studio.
Then we need to add the Flutter and Dart plugins for Android Studio. On the welcome screen, Select Plugins in the left hand menu. Under the Marketplace tab search for Flutter and Dart and
click the Install button for each. This will require a restart of Android Studio.
You will also need to set up at least one AVD to run your emulator and test your Flutter apps. Do this through the AVD Manager in Android Studio. You should have Android 11, 12, and 13 (APIs 30,
31, 33) installed through the SDK Manager. API 34 can also be installed.
# Start a Flutter Project in Android Studio
From the welcome screen, just click the button that says New Flutter Project then follow the steps in the wizard.
If you have another project open in Android Studio, go to the File menu and mouse over New and select the New Flutter Project option in the list, and follow the steps in the wizard.
# Project Configuration
Once you have a project created in either VS Code or Android Studio, look for the pubspec.yaml file. This file contains the settings for your project.
If you are not sure about how YAML works, look back on the notes and video in class 1.1
# App Name
In each Flutter project there is a pubspec.yaml file at the project root. This file holds all the settings about your project, similar to how a manifest.json file does for a PWA.
The name of your App will be set with the name property in the pubspec.yaml file.
Here is a small simple version of what the pubspec file contains:
name: app_4
description: A new Flutter project.
publish_to: "none"
version: 1.0.0+1

environment:
  sdk: ">=2.7.0 <3.13.8"

dependencies:
  flutter:
    sdk: flutter
  cupertino_icons: ^1.0.0

dev_dependencies:
  flutter_test:
    sdk: flutter

flutter:
  uses-material-design: true
2
3
4
5
6
7
8
9
10
11
12
13
14
15
16
17
18
19
Remember that the tab spaces have meaning in YAML files.
# Running an App
To launch an app from VS Code:
We need to first open the main.dart file that is inside the /lib folder. Once this file is open VS Code will show a Run and Debug button above the editor area. You can also open the Run menu at
the top and click on the Start Debugging item or just hit F5.
Once you click the key, button, or menu item, then you will be prompted with a list of places to run your app. This list will include the iOS Simulator and any AVD that you have created through Android Studio.
After the initial launch of the app, you will see a new control panel at the top of VS Code that lets you stop or restart your app.
After launching your first app you will be prompted to launch additional dev tools. The tools include a Widget Inspector that can be turned on by the blue magnifying glass in that new control panel at the top.
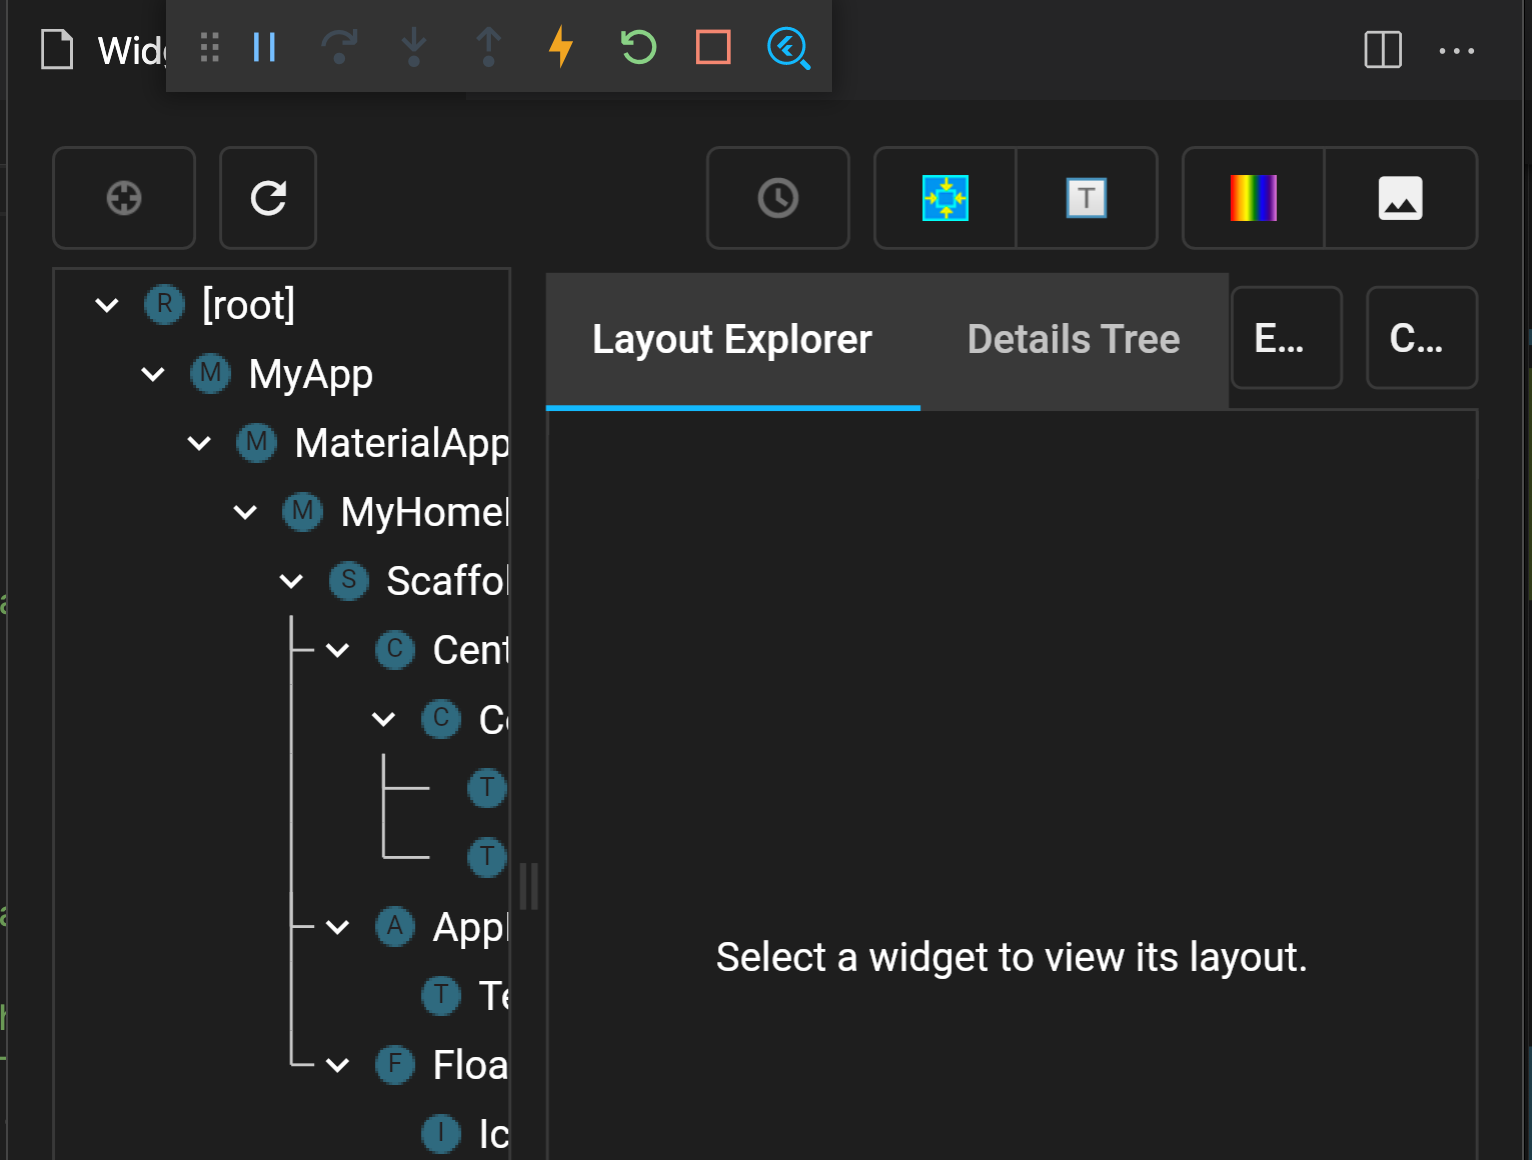
In the status bar at the bottom of your VS Code window you will see a clickable area that says Dart Dev Tools. Click on that to open the list of different Dev Tools to launch. The lightning bolt
button is to reload the app after making changes.
To launch a flutter app from Android Studio:
Open your project that you previously created and look in the tool bar at the top. It will have a run button as well as a list of possible connected devices, AVDs, and iOS Simulators. The iOS simulator must be running to appear in the list. See the image below.
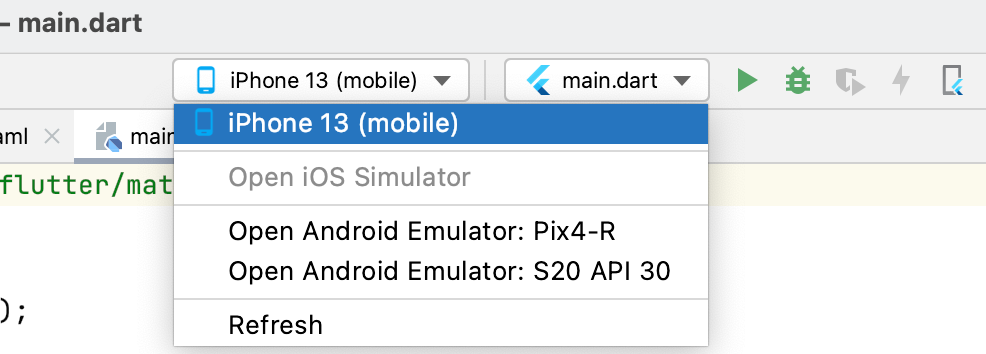
The lightning bolt icon button is to reload the app after making changes.
Alternatively you can go to the Run menu and select the Debug option to run your app with whichever device was selected in the list of possible connected devices.
# Launching a Flutter App to an iOS Device
Android devices will appear in the list inside Android Studio and VS Code.
Before you can launch on a physical iOS device you need to set up a few things in XCode. Here are the setup instructions
You will also need to join our Apple Developer Account and register your device with our account. If you have a physical iOS device that you want to use for Flutter, you need to send your UDID from your device to Steve.
The simplest way to get an iOS UDID is to connect the phone to your MacBook with a USB cable, then click on the Apple Icon in the top right corner of the screen, and then select About This Mac.
In the window that appears, click on the System Report button. When the system report window appears, select USB in the left hand list. Then look for your iPhone in the top half of the right hand
panels. Click on your device in that top list and then you will see your UDID in the bottom window. Copy and paste the UDID into an email for Steve.
# Assets
To add assets, like fonts and images, to your project create a folder at the root level called assets.
You can create sub-folders for each type of file inside the assets folder.
Drag whatever files you want inside the assets folder and its sub-folders. Then you need to update your pubspec.yaml file to make it include the files in the project.
Create a new section in the pubspec.yaml file with the heading assets inside (indented below) the flutter section heading. In the example below, the two images hello.jpg and goodbye.jpg are
loaded from the /assets/images/ folder. The last line - assets/subdirectory/ will load ALL files that are inside the /assets/subdirectory/ folder as available assets for your project.
# this is the assets section of the file
# this is a comment in a yaml file
flutter:
  assets:
    - assets/images/hello.jpg
    - assets/images/goodbye.jpg
    - assets/subdirectory/
2
3
4
5
6
7
Feel free to delete any of the extra comments that come in the starter
pubspec.yamlfile.
# Flutter Commands
There are LOTS of CLI commands for the flutter program.
Here is the full list of commands.
# What to do this week
TODO Things to do before next week
- Read and Watch all the course content for
9.1,9.2, and10.2 - Finish working on the step 4 of your Hybrid project